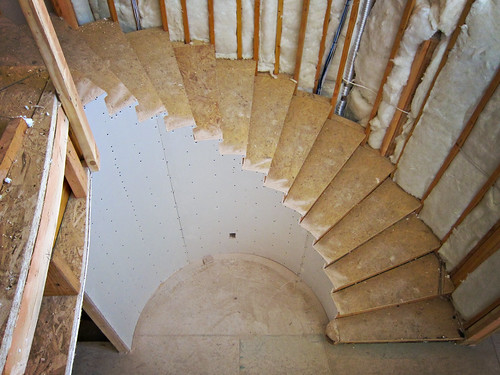
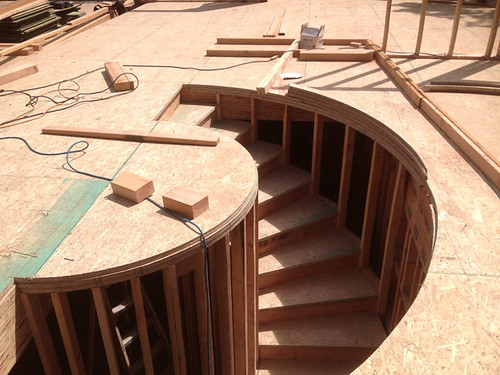
I asked the sheet rock guy how he did this tight radius curve on our stairs. I thought he may have scored the back of the drywall or sprayed it with water to soften it but he said he just ... slowly... pressed it into place. We've had considerable rain in the last week or two and he said the sheet rock has absorbed moisture and that's why it can bend like this without snapping.
Ha! And I thought there couldn't be a silver lining to all this rain!
Thursday, December 13, 2012
Radius
Tuesday, December 11, 2012
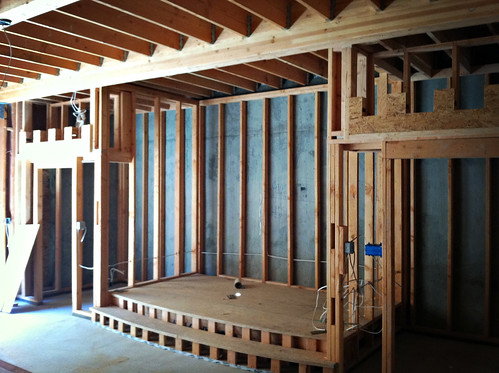
Sheet rock
Three and a half days of drywall install and they've almost finished the 2800 square foot main floor. After staring at framing for so many months, it's very exciting to see the walls actually starting to look like walls!
We started out with a half dozen guys but today we were down to just two (and they didn't arrive until 10:00 and were long gone when I stopped back by at 4:00 PM). I hope we can persuade our general contractor to assign more men to our job since our promised Christmas move-in date has been pushed out to March 1st and we can't afford to miss that date because we have no place to live after February 27th.

We started out with a half dozen guys but today we were down to just two (and they didn't arrive until 10:00 and were long gone when I stopped back by at 4:00 PM). I hope we can persuade our general contractor to assign more men to our job since our promised Christmas move-in date has been pushed out to March 1st and we can't afford to miss that date because we have no place to live after February 27th.
Friday, November 30, 2012
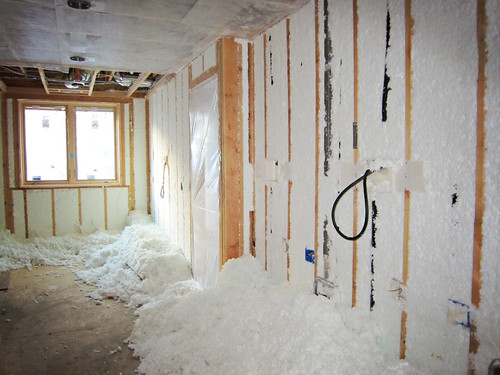
Insulation
Our first framing inspection was painfully delayed but was finally scheduled for October 29th then it was postponed again for nearly a month but finally happened yesterday. And there's good news at last! We passed!!
Now we can start to move forward again. First stop: Insulation.
They blew this stuff into the walls then scrapped off whatever hanged over the 2x4's. The festive result at the end of day one are these large banks of 'snow' all over the house! :)
Now we can start to move forward again. First stop: Insulation.
They blew this stuff into the walls then scrapped off whatever hanged over the 2x4's. The festive result at the end of day one are these large banks of 'snow' all over the house! :)
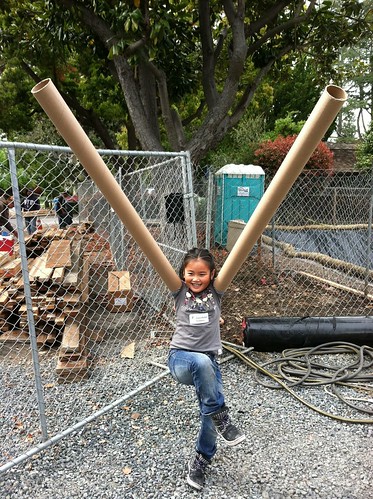
A fence and gate like this?
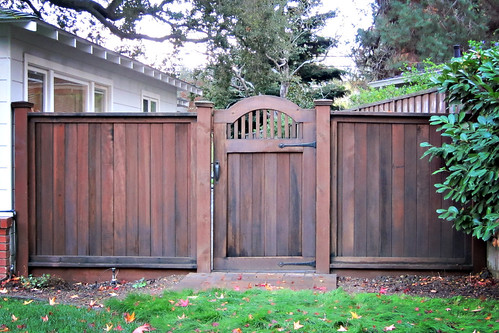
Funny how you go through life casually interacting with hundreds of ordinary things every day. And you never stop for even an extra second to think about the details of any of it.
That's the case with the fence and gate for our new house. Obviously, we'd notice right away if it was constructed out of cardboard and Bubbalicious chewing gum but in just about any other case, we'd be pretty unlikely to notice.
Wednesday, November 28, 2012
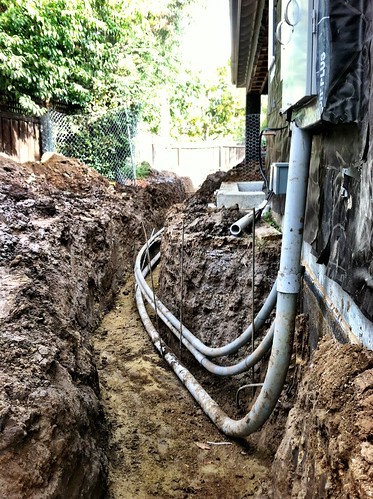
Electric and Gas
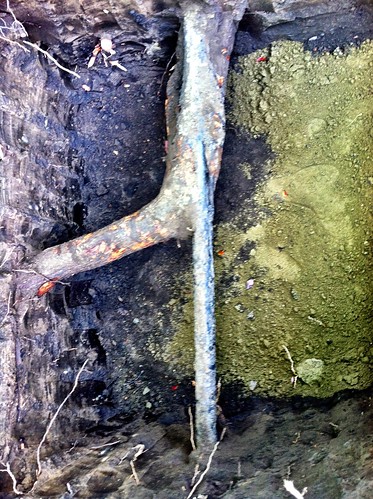
We finished digging the trenches for the gas and electric today.
Isn't this weird!? The gas line has been totally enclosed inside the root of our Camphor tree!
UPDATE: Unfortunately, we noticed that PG&E cut this huge root away from their pipe when they connected the gas line. The tree suffered a substantial amount of root damage while the trench for the gas line was being excavated and this is just one more big burden for the tree to overcome. We hope it's strong enough to handle all the stress!
Tuesday, November 27, 2012

Wednesday, November 14, 2012
Pool construction
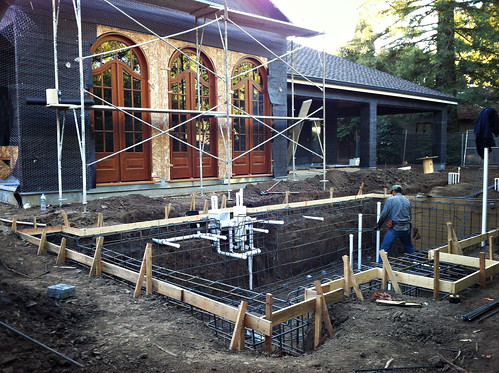
We're making nice progress on the pool. Should be ready for gunite within a week or so.
Friday, November 9, 2012
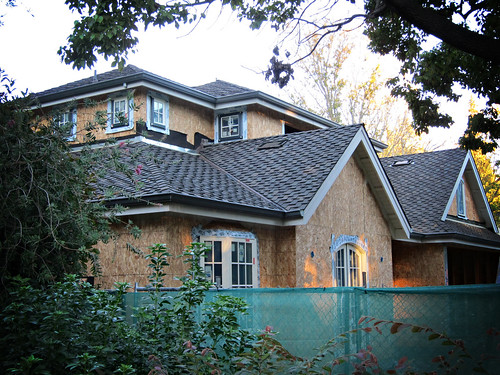
Wrapped Up
Here we are nearly one month after I posted a similar view of the house (see Oct 13th post, below) and we finally have something new to see on the exterior.
This black paper goes on under the siding and, hopefully, that means the siding will be going on soon!
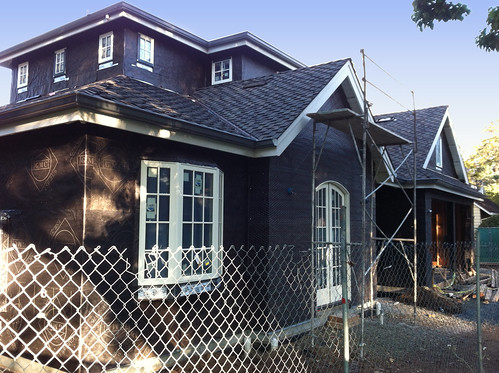
This black paper goes on under the siding and, hopefully, that means the siding will be going on soon!
Thursday, November 1, 2012
Three French doors
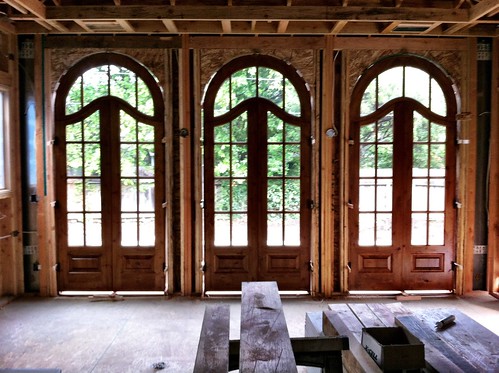
These three pretty doors were installed yesterday. Even surrounded by construction debris and raw framing, they're lovely.
Saturday, October 13, 2012
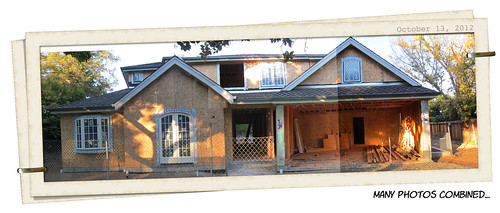
Peeking over the construction fence
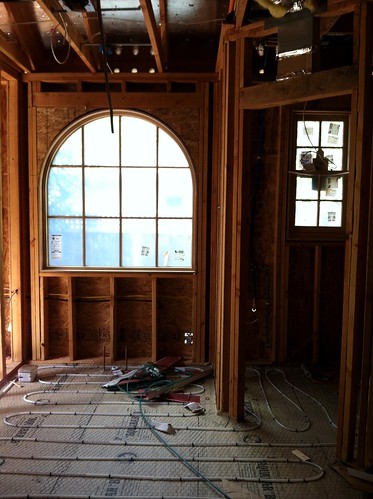
It's been an especially busy week! Almost all of the doors and windows are installed, the low voltage guy is pulling his wires, electric and plumbing are all in and drywall goes up soon!
Everything is really starting to come together and it's very exciting and satisfying even though all of the big decisions at this stage have really kicked the stress level up several notches.
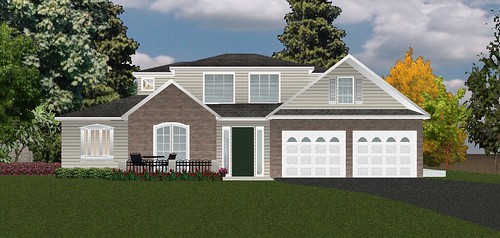
We have tall construction fences around our large trees at the front of the property so it's impossible to get a photo of the entire house from any angle other than this one. It'll be nice to see that fence come down.
Our front door and 3 doors at the back of the family room should arrive next week.
Everything is really starting to come together and it's very exciting and satisfying even though all of the big decisions at this stage have really kicked the stress level up several notches.
We have tall construction fences around our large trees at the front of the property so it's impossible to get a photo of the entire house from any angle other than this one. It'll be nice to see that fence come down.
Our front door and 3 doors at the back of the family room should arrive next week.
I stitched four our five photos together
Because of the construction fence and the large trees, it's pretty much impossible to get a full front view of the new house. I snapped a half dozen photos and stitched them together to make this one. :)
Wednesday, October 10, 2012
Windows going in! Woohoo!
Our windows were delivered last Thursday and they started installing them this week. Should be finished tomorrow! Then we can move on to the next phase - whatever that is! :)
Saturday, September 22, 2012
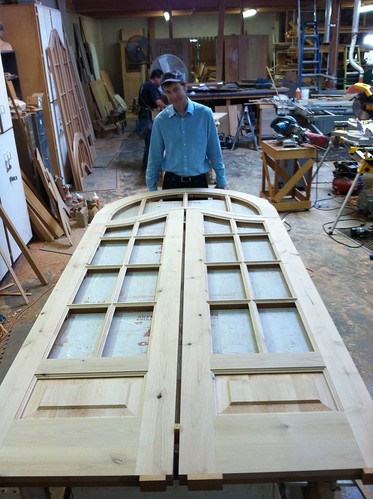
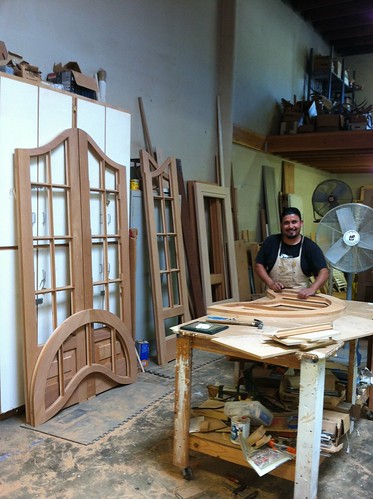
Family Room Patio Doors
We stopped by David Rosenquist's shop today to discuss wood stain options and were treated to a sneak peek of our three patio doors! It was exciting to see these lovely doors and meet the talented people who are creating them!
Wednesday, August 22, 2012
castle closets
The castle closets, stage (and arches, which aren't pictured) are all framed. I'm especially pleased with how the crenelations turned out. We'll paint the little area behind them dark blue and use a rope light to back light the top of the castle wall. I hope it looks as good in reality as it does in my head!
I found some great theme lighting on sale today. This one is a Kathy Ireland La Romantica chandelier. It'll be the main lighting for the playroom.
Then there was this pretty little thing...
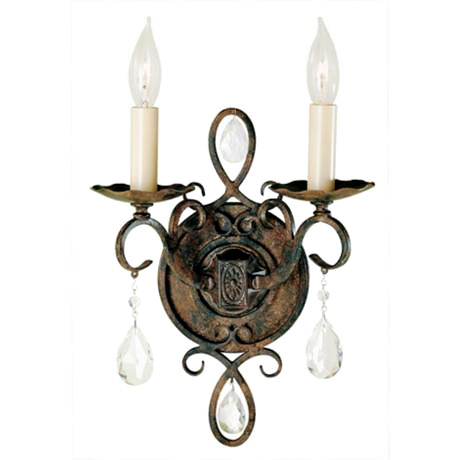
It's 9" wide and 12" high and I kept coming back to it at the store because the old rusty iron and elegant scroll work was such an obviously good fit for a castle. But I worried about the fancy embellishments until I leaned in close to examine the crystals and they seemed to whisper to me... Hey, girls live in castles too! Sold.
I love this piece -- and I got it for about one dollar per square inch.
I love this piece -- and I got it for about one dollar per square inch.
Finally, here's a peek at our rug for the playroom...

This is just a small swatch but I think it gives you the general idea. It's a rich, lovely, mix of colors and patterns that were common in medieval times. Or, at least I think they were since I'm not actually old enough to know.
This rug was discounted because it was discontinued and there were only three left in stock. We took two of them at a HUGE discount and we'll stitch them together to form one room-sized rug then have that installed into the floor over a generous carpet pad (so it doesn't shift all over the place as the kids run across it. We didn't originally intend to have something this nice in the playroom but the quality, price and appearance was just too appealing to pass up! Proof that being patient pays off!
Thursday, August 16, 2012
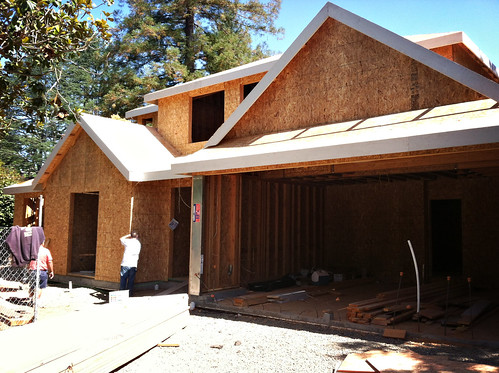
left front of house
It's not easy to get a good pic of the front of the house since we have some lovely large trees blocking the view from the street. But here's my best effort anyway!
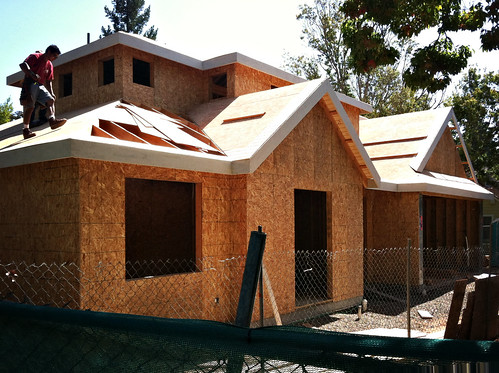
And the right front of the house:
right front of house, a photo by Donna & Andrew on Flickr.j
There will be a pretty arched window in the dormer over the garage. We still have to frame that in.
And the right front of the house:
right front of house, a photo by Donna & Andrew on Flickr.j
There will be a pretty arched window in the dormer over the garage. We still have to frame that in.
back patio
We sacrificed a bit of space inside the house so we could have a few extra square feet of living space outside. I think we're going to love this area! From here, we'll be able to watch the kids play while relaxing in a nice shady, breezy stretch of covered patio! And in the winter, we'll have some natural gas heaters out here to keep us toasty!
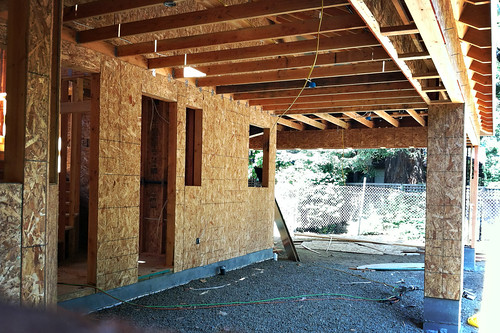
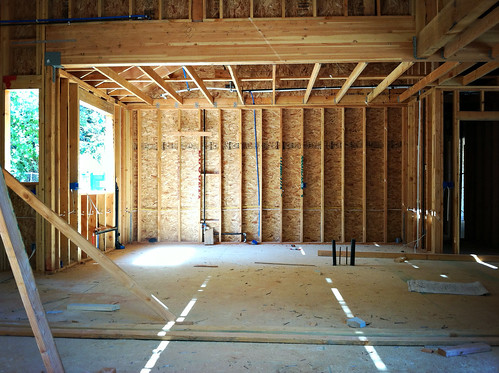
kitchen (viewed from family room)
Here's where the kitchen will be. The plumbing is pretty much totally in place and the electrical is mostly there. Next week, we'll meet our cabinet maker and figure out the plan for the kitchen and island.
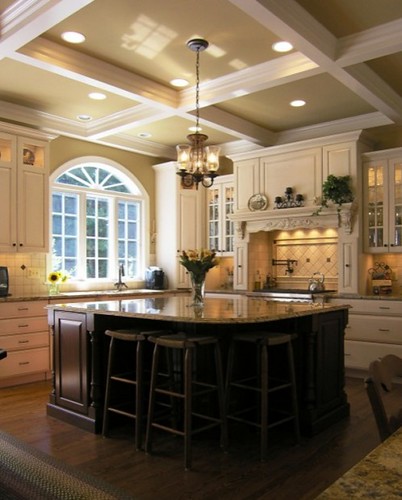
Here's our inspiration kitchen. Not thrilled about the ceiling but LOVE the look of the rest of it. Sweet!
Here's our inspiration kitchen. Not thrilled about the ceiling but LOVE the look of the rest of it. Sweet!
kitchen inspiration, a photo by Donna & Andrew on Flickr.
family room (viewed from kitchen)
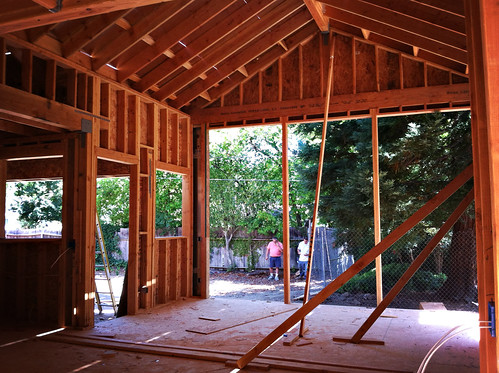
This is our family room. We won't have a Cathedral ceiling (as you might expect) but we're planning something nice. Stay tuned. ;)
Saturday, July 14, 2012
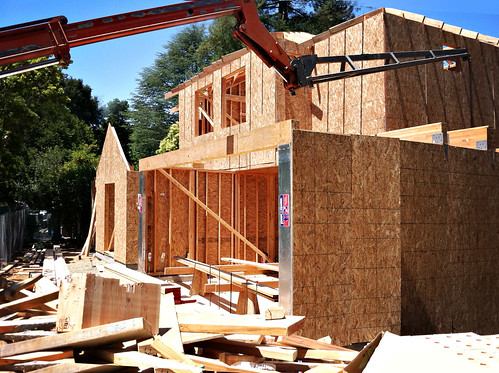
View from the back
It's really exciting to see the house take shape so fast. Lots of decisions to make now too including things I've never thought about (like what design of gutter we want).
We walked through the house with our window rep (Hi Carole!) and triple checked all of the window sizes and styles.
Wednesday, July 11, 2012
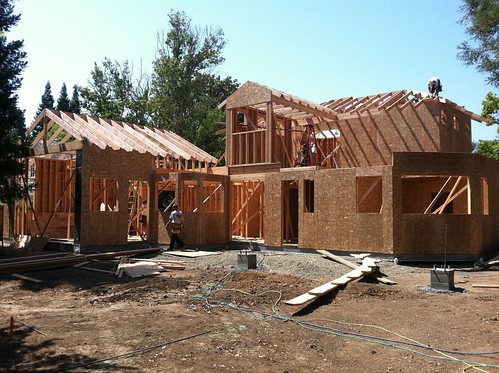
what a difference 3 weeks makes!
We went on vacation mid June and returned to find our ground level house was framed up to the 2nd floor!
Yesterday, I watched them build the roof over the girls' bedroom (2nd floor) and it's so exciting to actually walk through the house and see the rooms the way we imagined them on graph paper.
We have kids but this experience is almost like having another baby and seeing the features revealed in ultrasound photos. This is an extraordinarily expensive "kid" but, fortunately, we don't have to send it to college!
Saturday, June 23, 2012
Tuesday, June 12, 2012
Framing the basement
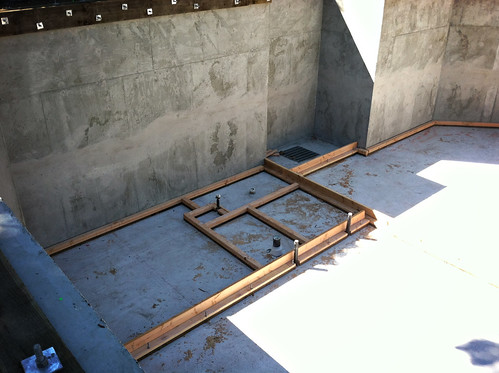
Framing started yesterday so, at last, there's enough progress to make a new blog post possible. This is the left side of the basement so the 2x4's shown here form the outline of the guest bedroom and bathroom and the lightwell and my tiny little photo 'studio' in the framed space at the lower left.
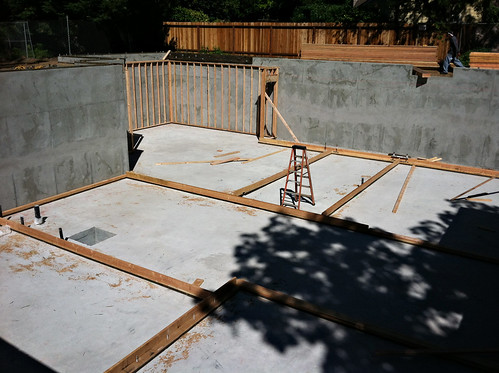
A wider view of the new framing for the basement. The area with the newly framed standing wall is the unfinished part of the basement. This is where we'll store all of the stuff that previously cluttered our garage. The area with the ladder is the craft area of the playroom. Just to the right of that is the playroom, itself (which we plan build with a castle theme).
Something interesting if not a tad unseemly: See the little square imbedded in the floor around the 9 o'clock position? That is a reservoir where all of the basement sewage collects. Since the sewer line is at street level, it's necessary to pump everything *up* to that line. No suprise that I've never spent a single moment contemplating this sort of thing before building a house.
If you visit either of these photos on flickr, I'll have little notes attached to the images to better explain the space.
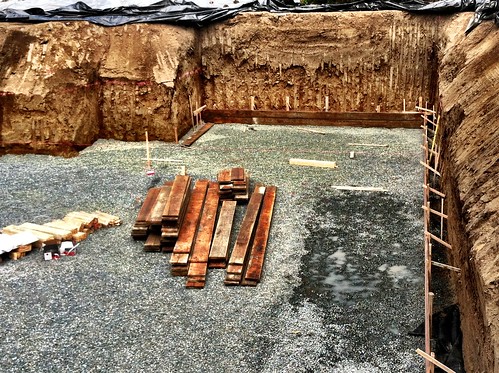
Friday, June 1, 2012
Framing starts soon!
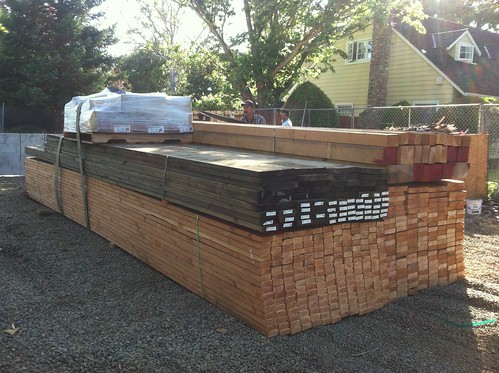
They dropped off a big stack of lumber this morning. It'll be exciting to see the upper level of the house take shape!
Wednesday, May 30, 2012
Monday, May 14, 2012
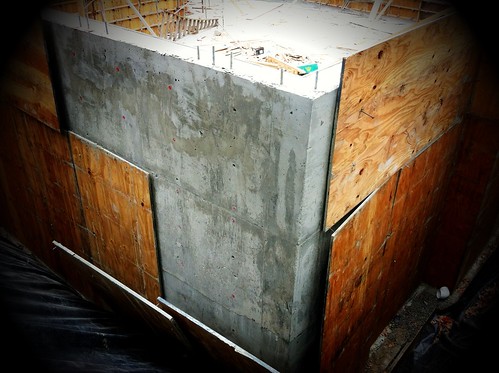
A wall appears!
And thus begins the slow process of removing all that wood to expose the fresh concrete walls beneath. It took a month to put all this up so I suspect it'll take several days to clear it all out.
Thursday, May 10, 2012
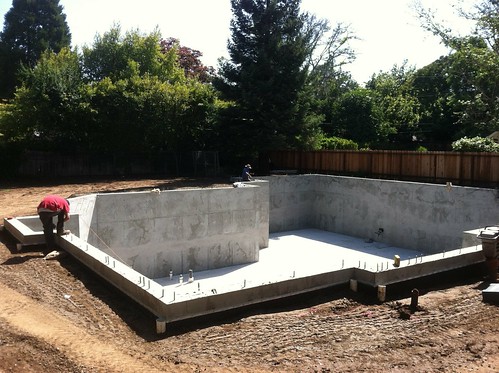
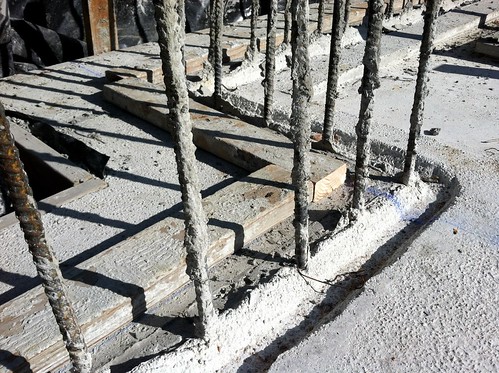
Pouring the Walls
We poured the walls today. Truck after truck offloaded their soggy content into a receptacle where a pump promptly pushed the wet oozing mess through a long hose and regurgitated it between the meticulously spaced plywood forms. The workers filled the walls to a height of just 3 feet then circled around again to lay down another three foot layer on top of the first. This process repeated itself until the entire perimeter of the walls were filled to the top.
Pouring concrete into a form often results in pockets of air throughout the concrete that can weaken the material when it cures. In order to remove these air pockets, you must consolidate the concrete throughout the form, evenly spreading out the material to leave no possible spaces. By inserting a concrete vibrator rod into the concrete, you can vibrate the material within the form, settling the concrete evenly. This removes the air pockets that reduce the concrete's density, increasing the overall strength of the material. Kinda makes you wonder what they did before this technology existed, huh.
Friday, April 20, 2012
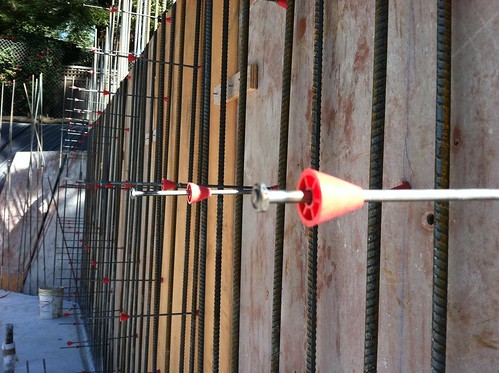
Hundreds of pins with red caps...
I guess there's more to this basement wall building than I originally thought. Yesterday, hundreds of these pins showed up and this morning I got a little bit more info about the process. Apparently, they'll support more rebar (horizontal) and hold the two pieces of plywood exactly 8 inches apart as the concrete is poured inside. Just when you think it can't possibly get more interesting! <wink>
Tuesday, April 17, 2012
Forming the Basement Walls
Here's a row of plywood forming the outside of one of the basement walls. It's an interesting process to watch. These large sheets of plywood are loosely attached to the 2x4's on the outside of the rebar. They're nailed together to form a solid wall. When this is finished, another row of plywood will be placed in front of the rebar and the two walls of plywood will be secured with pins and the concrete will be poured inside the forms. I've never seen anything like this before so I'm eager to see how it's done.

Monday, April 16, 2012
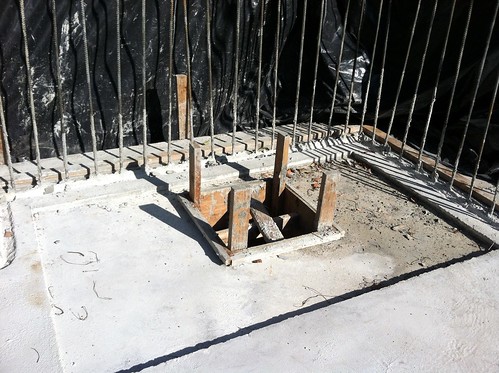
Light well
The basement floor was poured last Monday and then we sat idle for a whole week while it rained. Dang it! This is a photo of one of the light wells. The area in the middle (with the protruding lumber) is for drainage. If I understand correctly, there will be a sump pump there.
Thursday, April 5, 2012
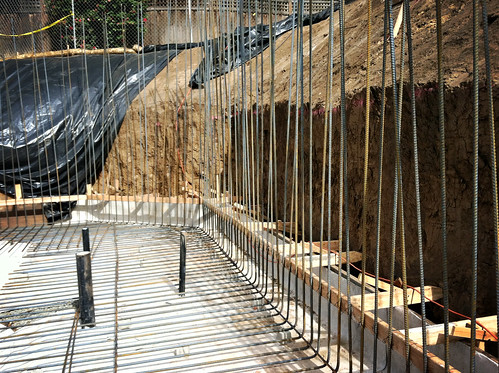
Whoa, that's a lot of rebar!

I'm so glad this is over because watching a half dozen guys spend four full days laying rebar is about as exciting as watching... well, just about anything would be more exciting.
The process is repetitious, tedious, and slow so it's painfully unsatisfying to watch. I can't imagine having this job. I think we're getting inspected tomorrow and we'll pour the basement on Monday. Now THAT should be exciting!
Tuesday, April 3, 2012
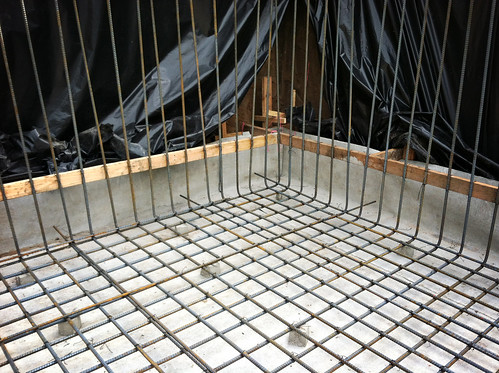
Rebar
Yesterday and today (and probably for the rest of the week), they've been busy putting in rebar on the basement floor. They'll pour 18 inches of concrete over this and then they'll form the walls and pour those too.

Monday, April 2, 2012
"Metro Tumbled"
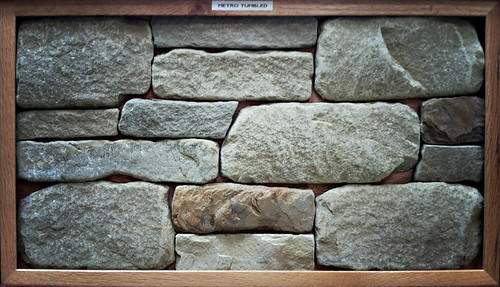
We like this for the fireplace wall. It's warm and rustic but subdued since it has a color that closely matches the wall color. The structure is organized and precise without being excessively formal. We just want to make sure this isn't something we'll have to struggle to resist painting in ten years.
Thursday, March 29, 2012
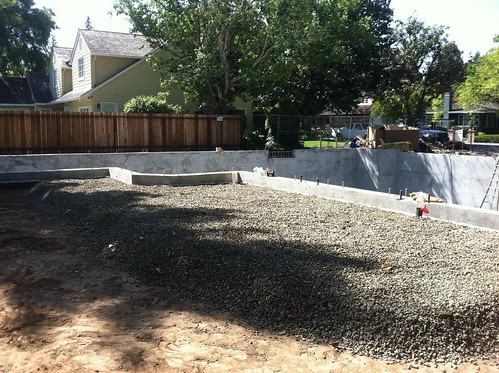
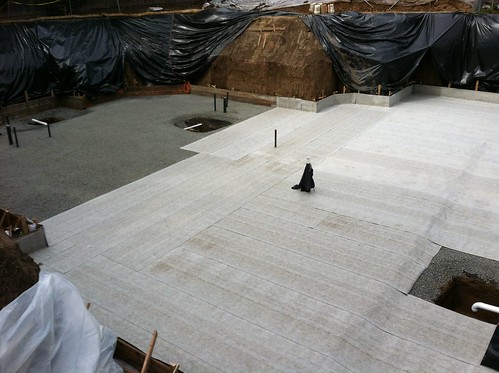
The layer between the gravel and concrete slab
Today, they applied a layer to the top of the gravel. Ultimately, this layer (shown in white, above) will be between the 6 inches of gravel and the 18 inches of concrete. It's about 1/8 inch thick and is supposed to bond to the concrete to create a water-proof barrier. They didn't finish today so they'll finish up tomorrow.
Wednesday, March 28, 2012
Forming the Master Slab
Today, they put in the forms for the master slab for the basement. They didn't get very far so they'll finish up over the next few days. Hopefully we'll pour the concrete next week.
Thursday, March 22, 2012
The Princess Suite Chandelier
We're creating a fun bedroom for the girls that they'll want to keep through Elementary school and Jr High and (dare we dream?) ... well into High School. Yeah, I know that's a tall order so we're trying to keep our expectations realistic and the costs low just in case it all has to change in a year or two.
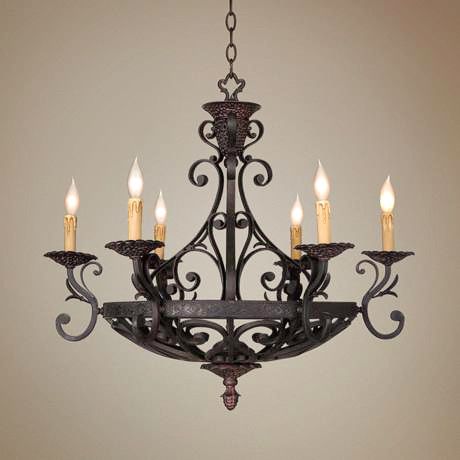
A fancy chandelier is a must-have but we've cringed at the price tag until I spotted this little gem at our local Orchard Supply Hardware (OSH) store:

It's a 24 inch diameter, 6 light chandelier for only $149 and I pulled it off the shelf and ran to the checkout line as fast as I could. Even thought it's not exactly what I want, the OSH price is really impossible to beat. In fact, I've not even been able to find it anywhere on the internet! So here's my question for my artsy-craftsy friends: How can I paint everything but the crystals of this chandelier to look like bronze or pink or some other interesting color?
I'm thinking something like one of these:


 Has anyone ever painted glass or crystal with good results? Also, I'm looking for reasonable (ie, cheap) sources for clear and colored hanging crystals so I can spiff this up just a little bit more. :)
A fancy chandelier is a must-have but we've cringed at the price tag until I spotted this little gem at our local Orchard Supply Hardware (OSH) store:

It's a 24 inch diameter, 6 light chandelier for only $149 and I pulled it off the shelf and ran to the checkout line as fast as I could. Even thought it's not exactly what I want, the OSH price is really impossible to beat. In fact, I've not even been able to find it anywhere on the internet! So here's my question for my artsy-craftsy friends: How can I paint everything but the crystals of this chandelier to look like bronze or pink or some other interesting color?
I'm thinking something like one of these:


Subscribe to:
Comments (Atom)